¶ Transport - Add Vehicles
¶ Overview
The Vehicles module is used to define and manage vehicles used for employee transportation. Users can add, edit, and manage vehicle details.
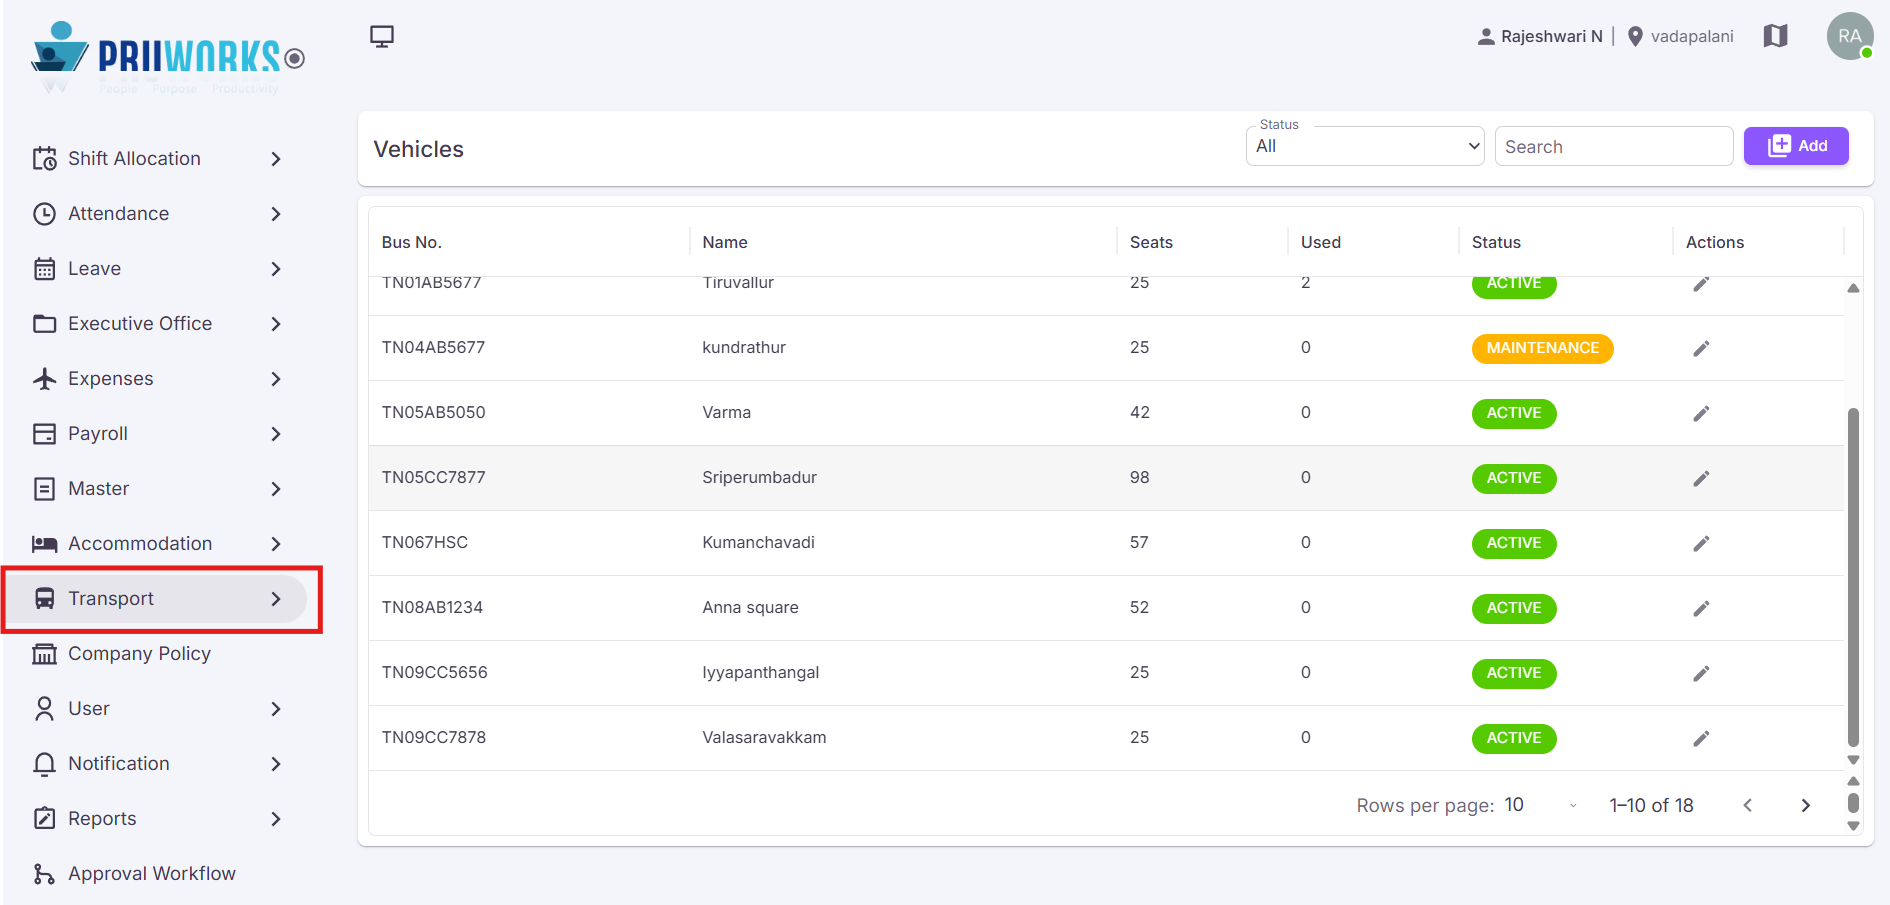
¶ How to Navigate to Transport
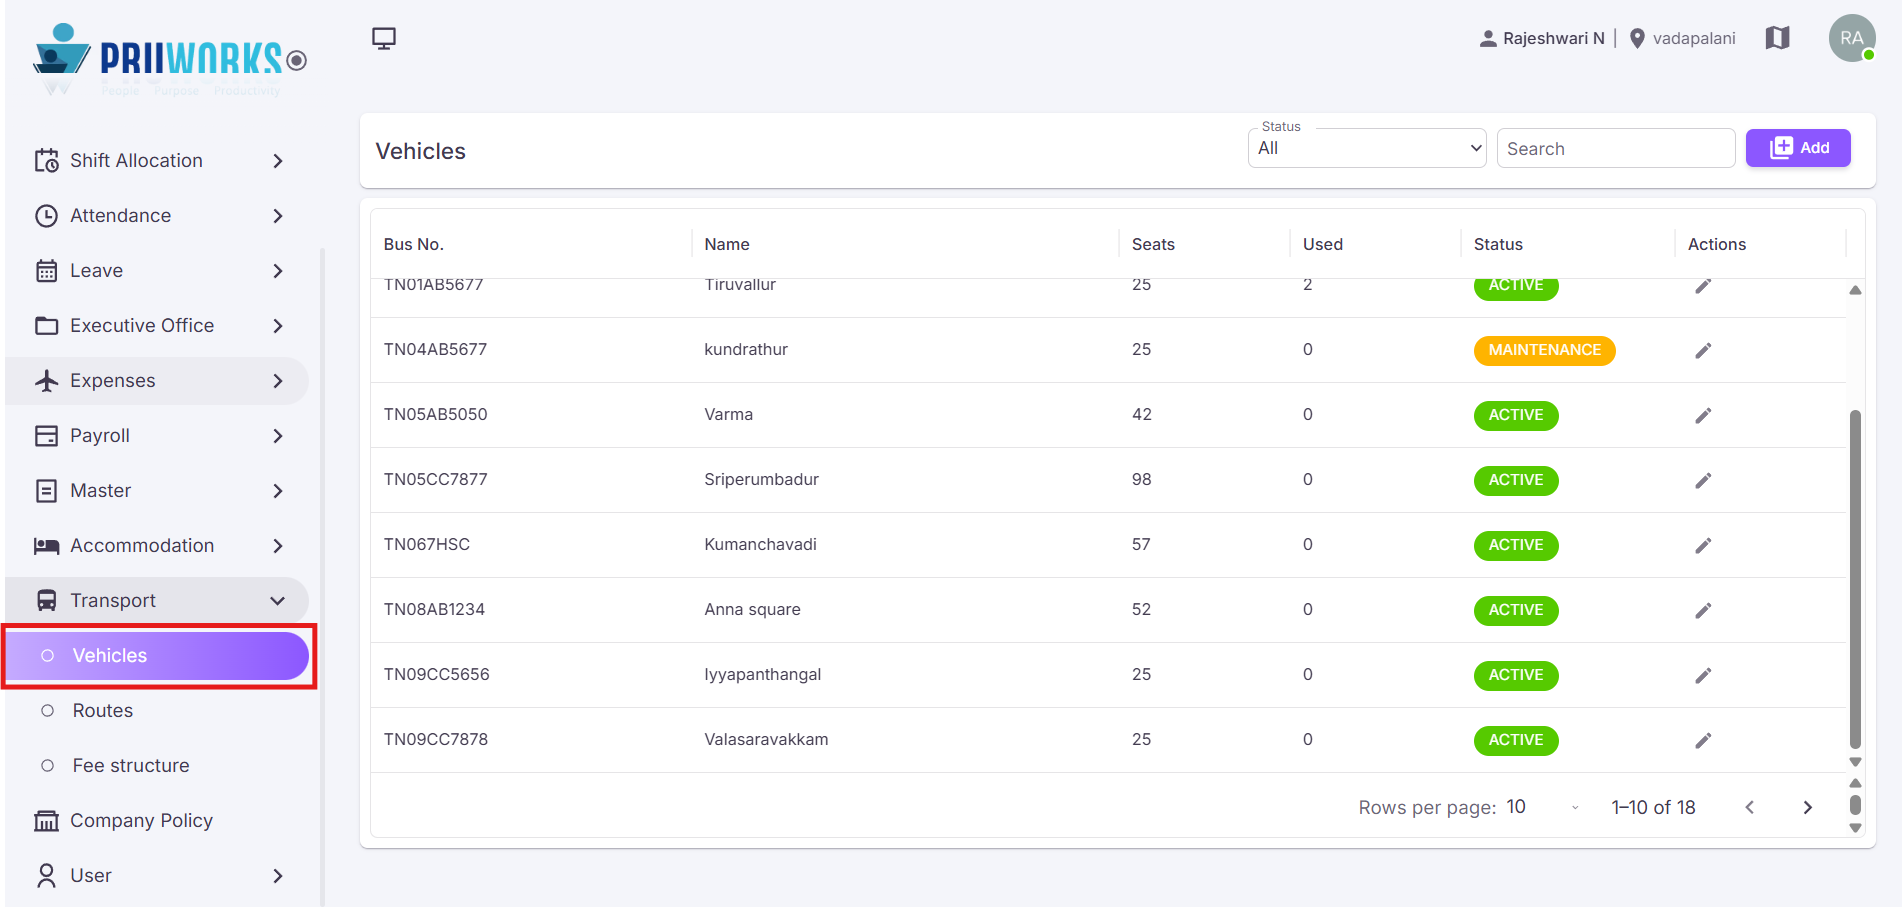
To create Vehicles, follow these steps:
- Navigate to Transport in the side menu.
- Click Vehicles sub menu.
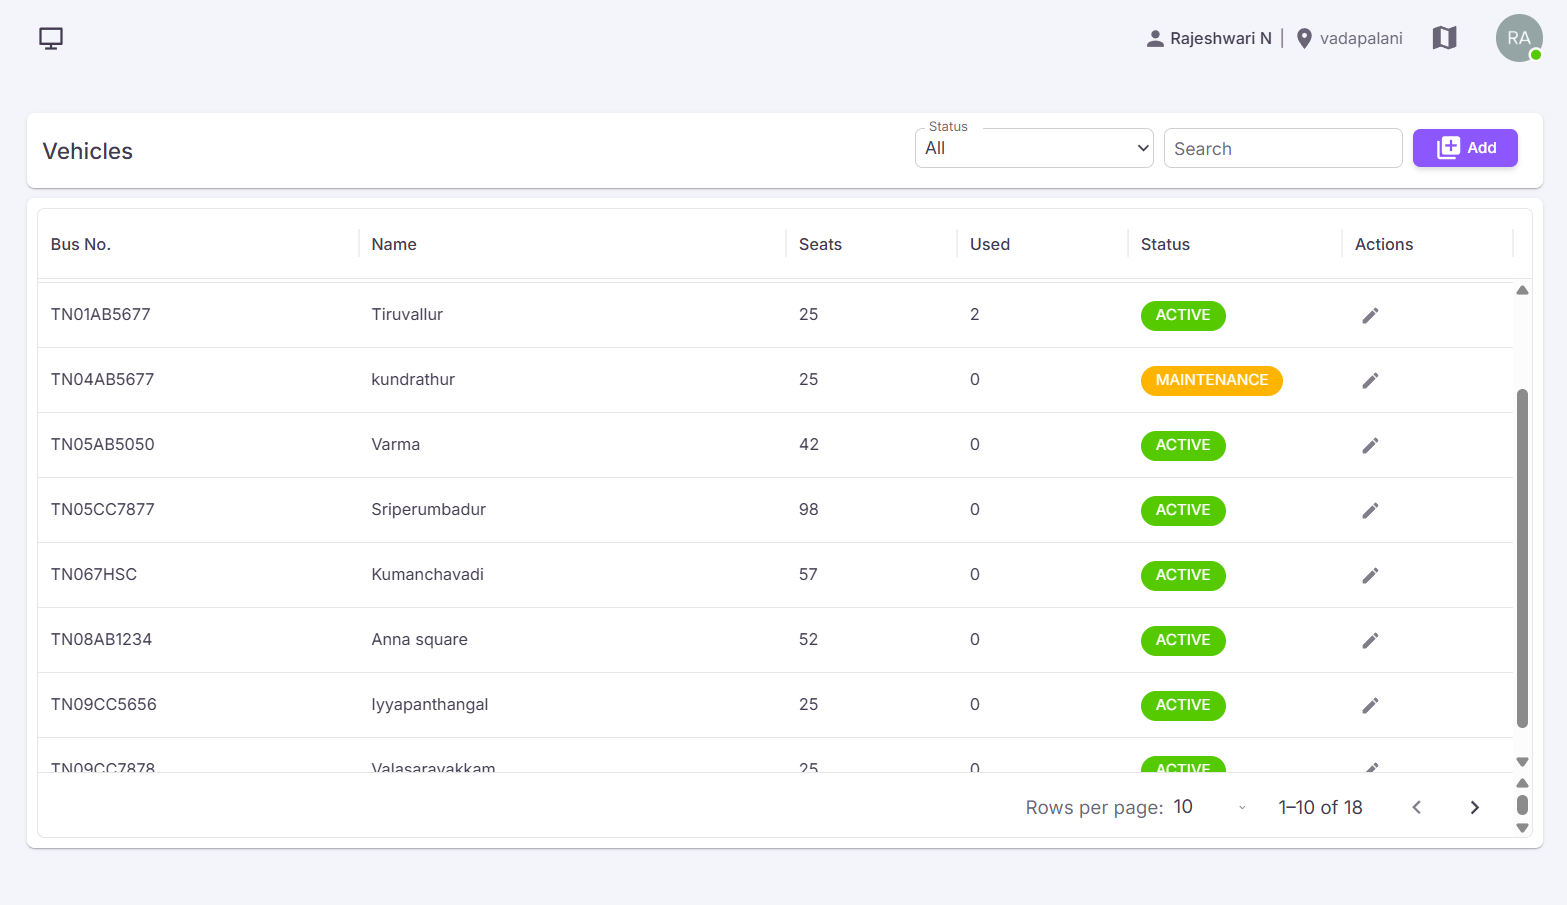
- The Vehicles screen will be displayed.
¶ Add Vehicle
Click the Add button in the Vehicles Screen.
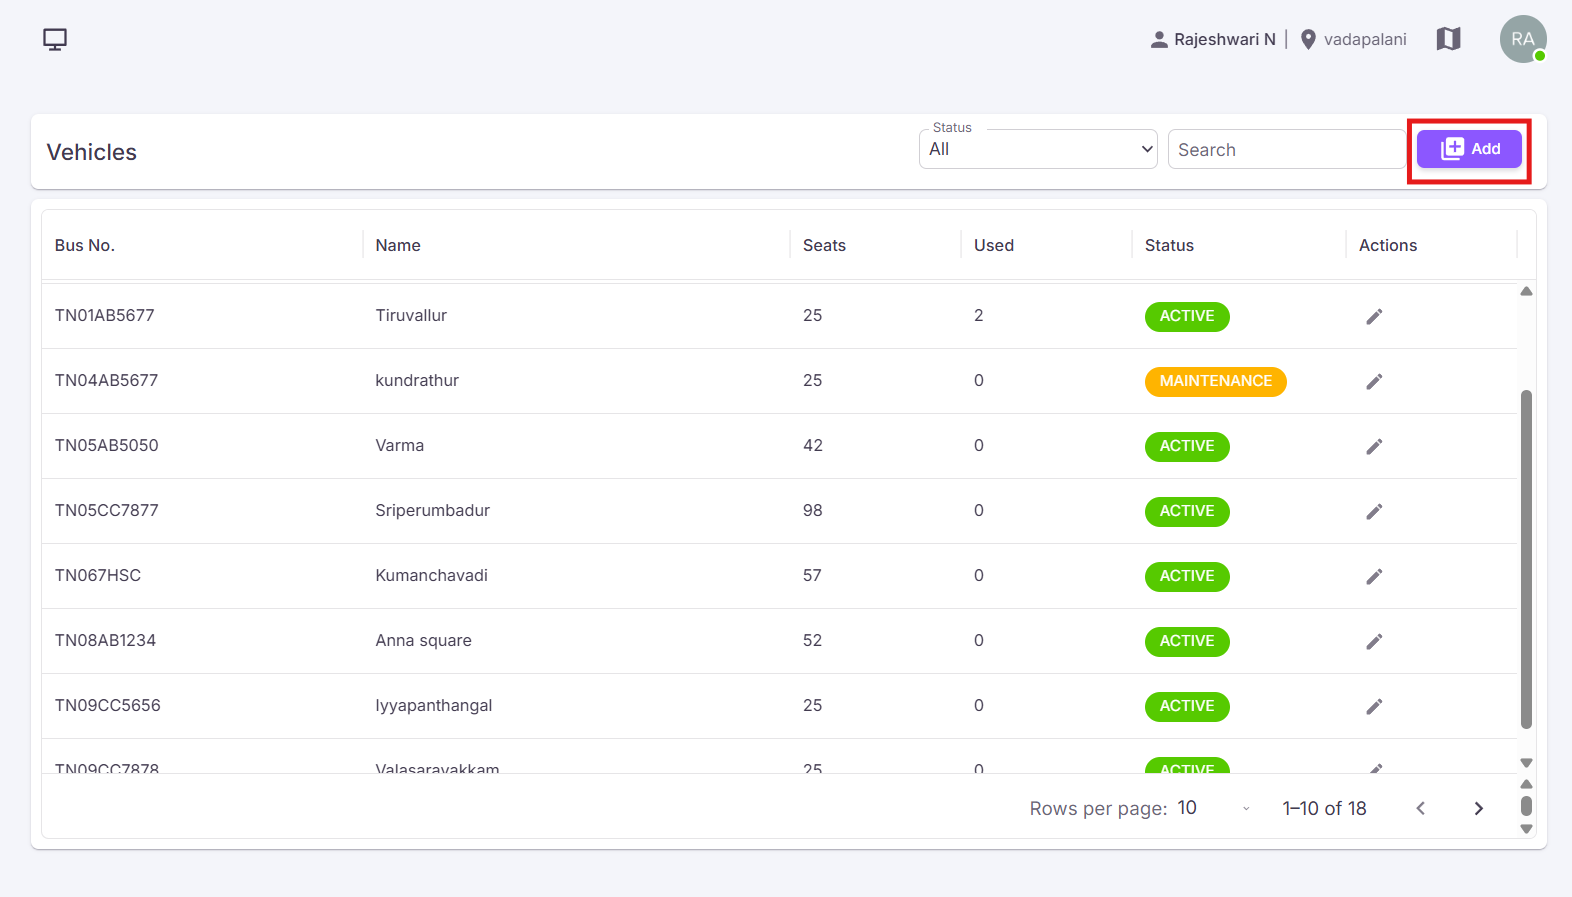
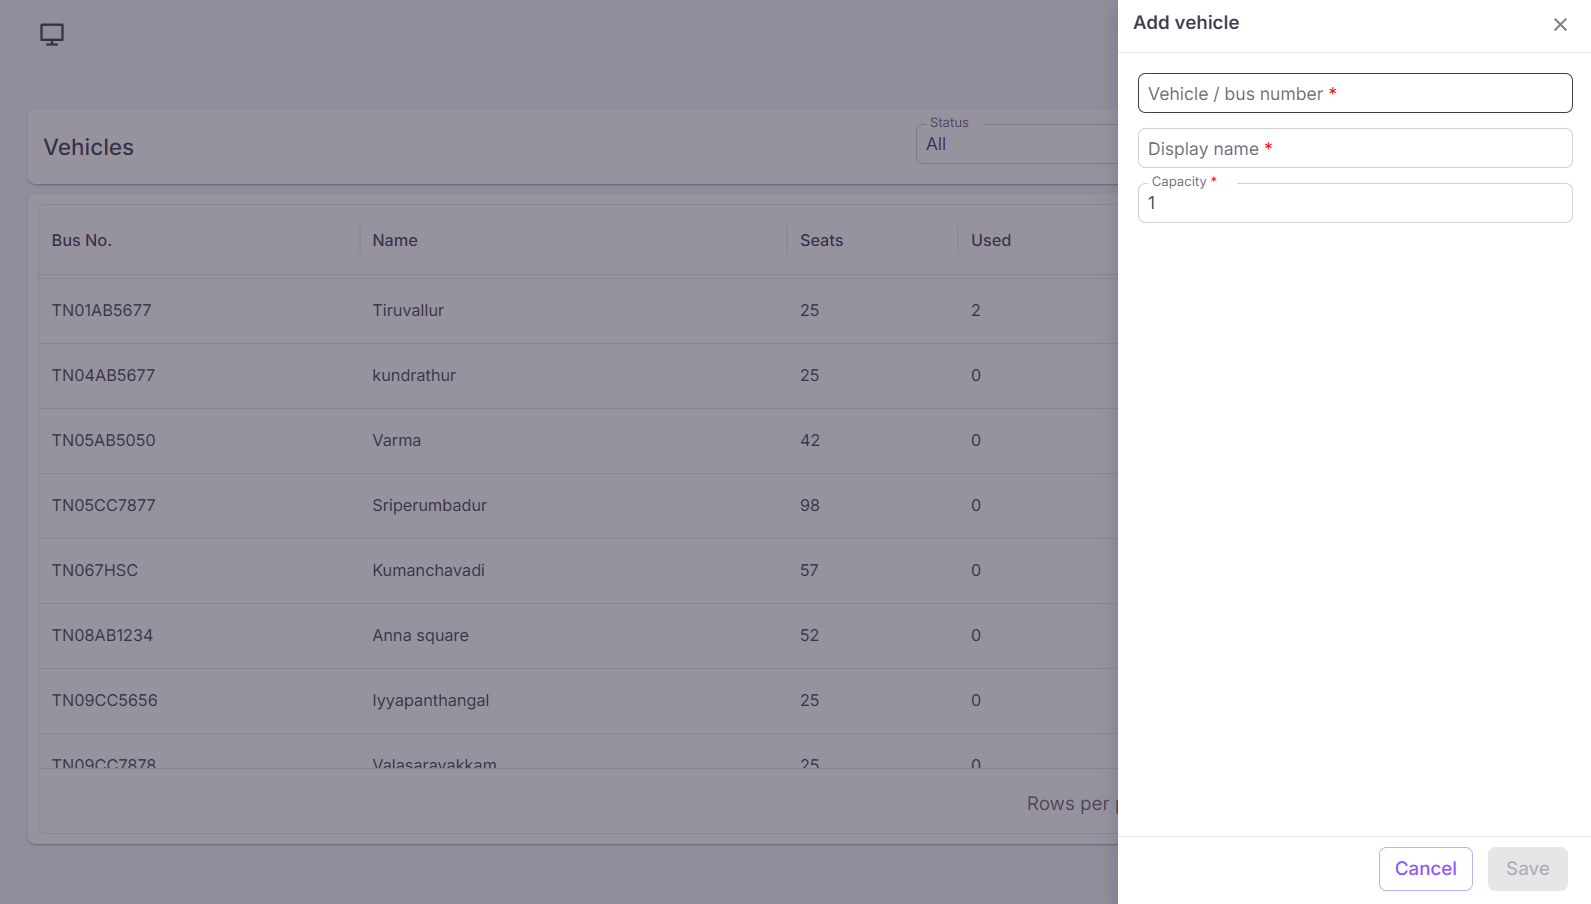
After clicking the Add button, the Add Vehicle form will be displayed with the following fields:
¶ Fields:
- Vehicle / Bus Number* – Enter the vehicle or bus number.
- Display Name* – Enter the display name of the vehicle.
- Capacity – Enter the seating capacity of the vehicle.
After entering the required details, click the Save button to save the vehicle. If you do not want to save the details, click the Cancel button.
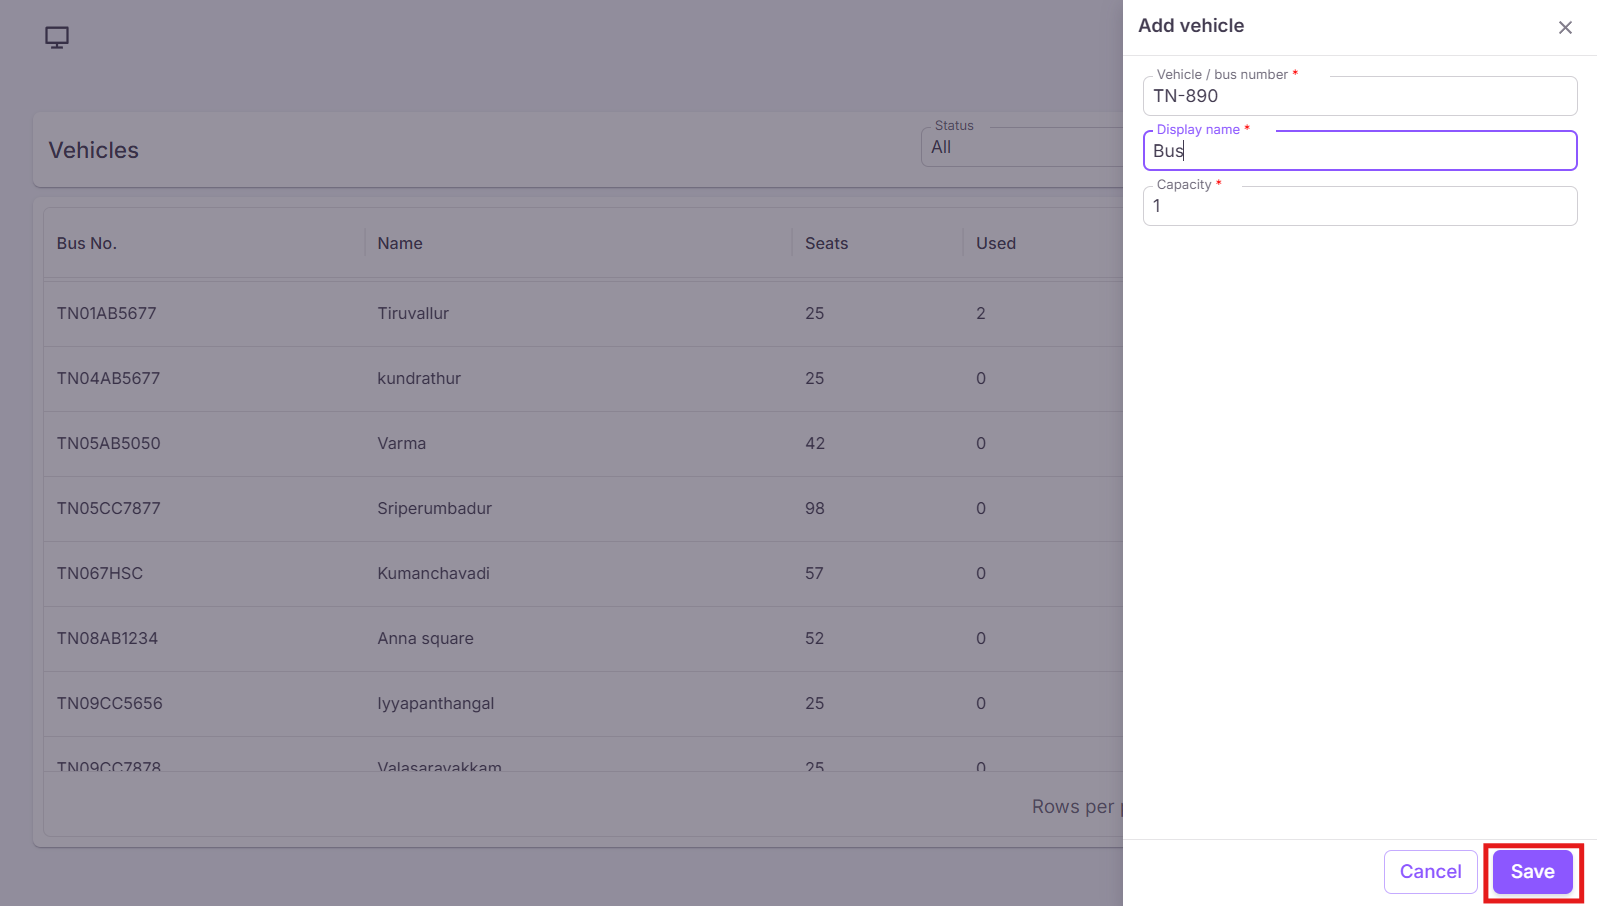
Note: Fields marked with an asterisk (*) are mandatory and must be completed before saving the vehicle.
Success: Upon successful submission, the vehicle will be added to the Vehicles List.
¶ Edit Vehicle
In the Vehicles screen, click the Edit icon under the Actions column.
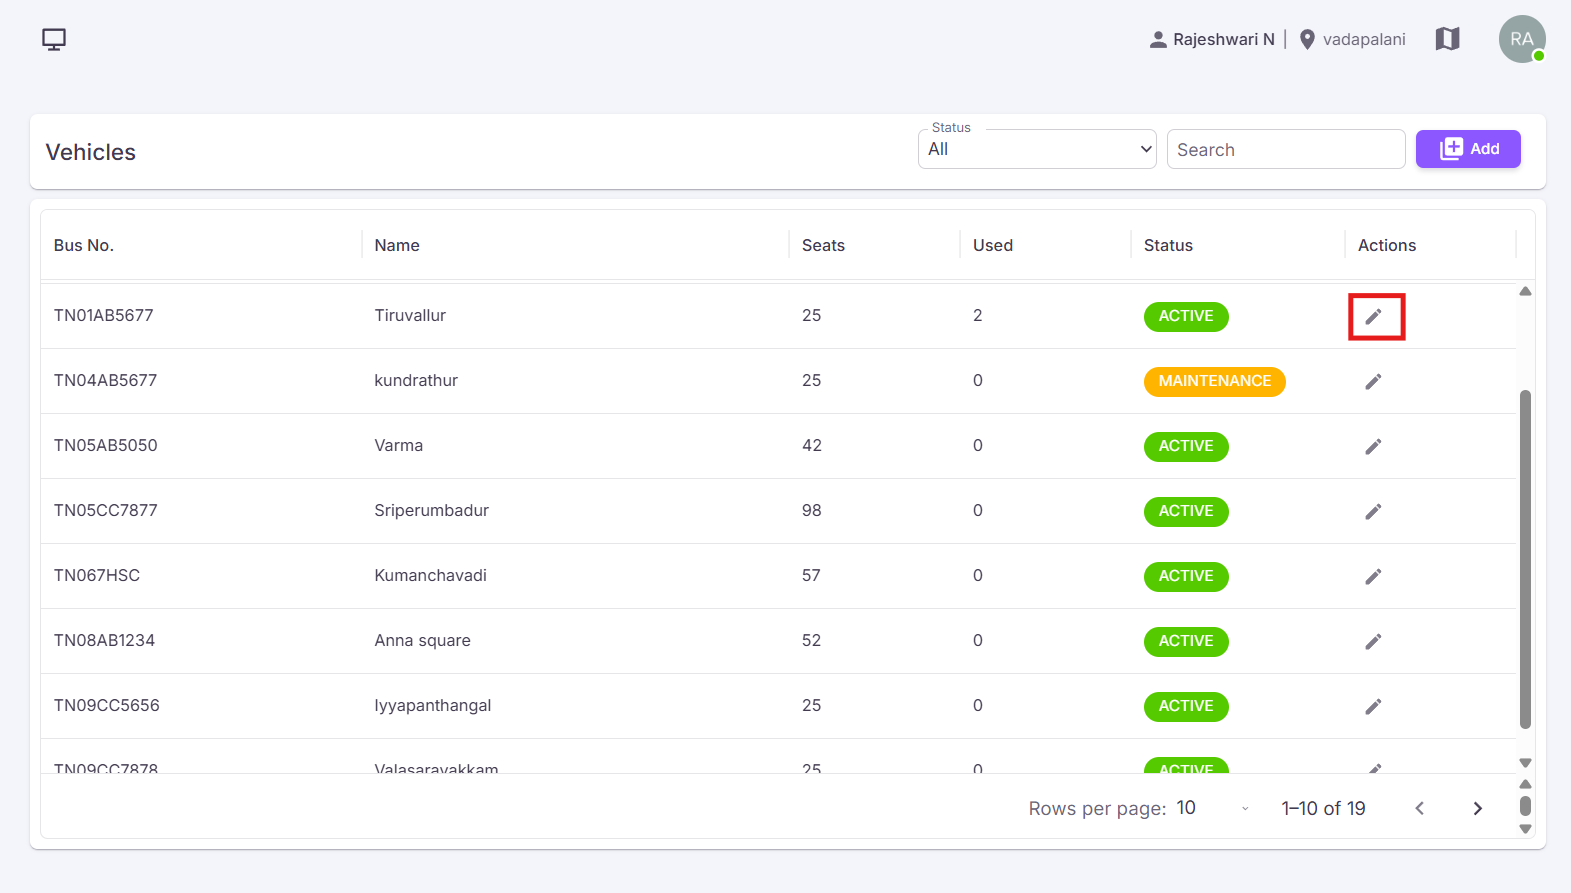
After clicking the Edit icon, the Edit Vehicle form will be displayed with the previously entered details.
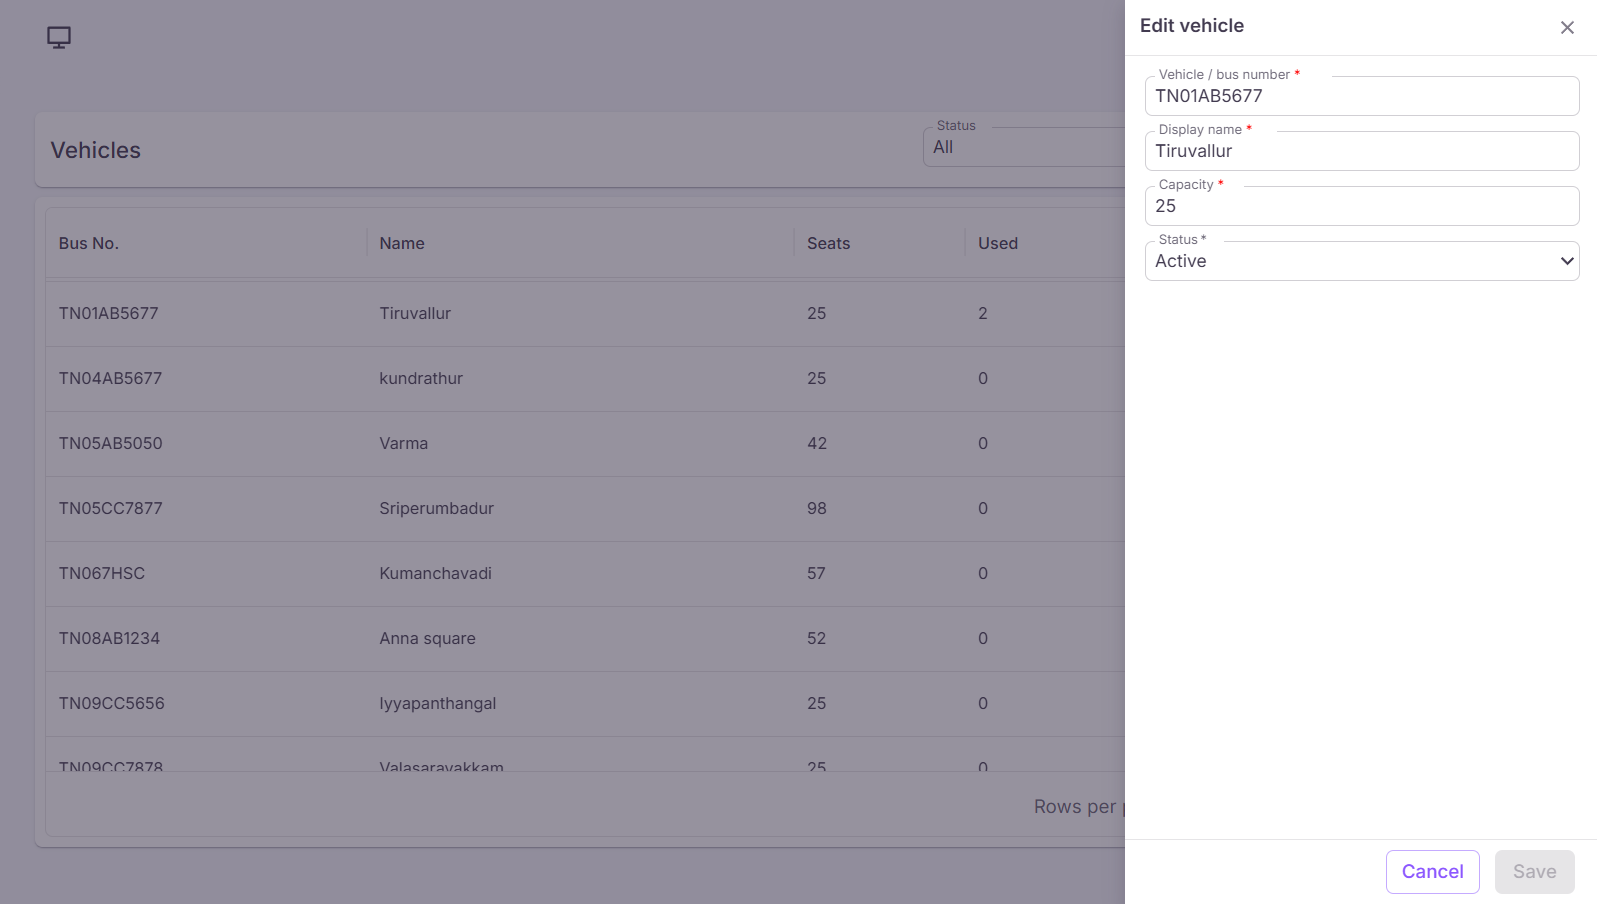
Make the required changes and click the Save button to update the vehicle. If you do not want to save the changes, click the Cancel button.
¶ Status Behaviour
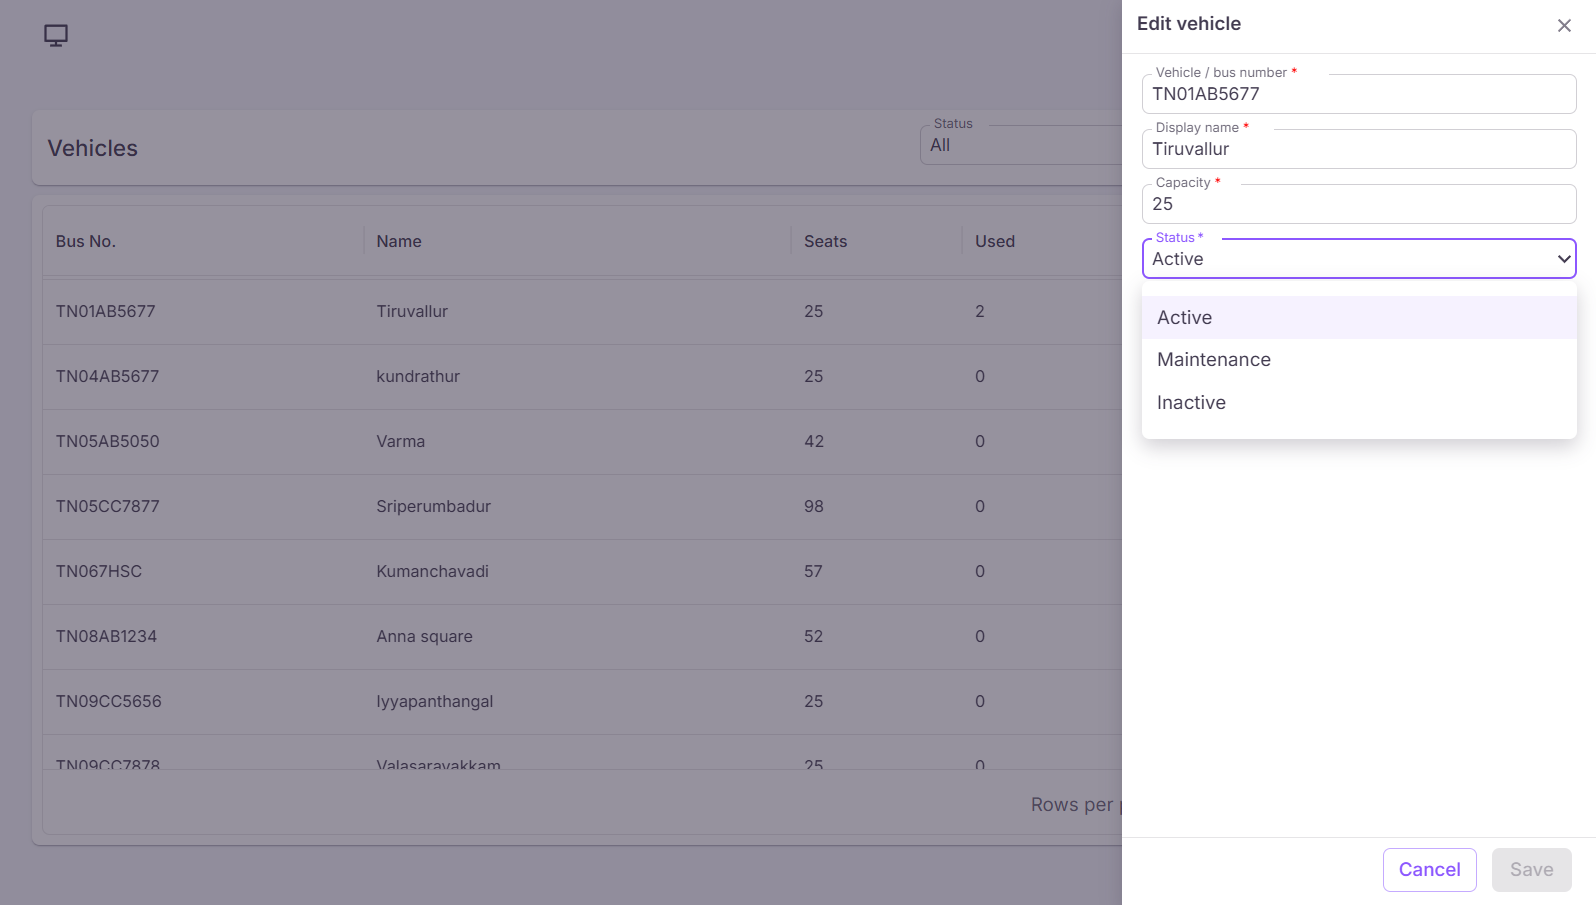
¶ If the Vehicle Status is set to Active
The status will be displayed as Active in the Vehicles List, and the vehicle will be available for selection in the Employee Transport Allocation module while adding or editing an allocation.
¶ If the Vehicle Status is set to Inactive
The status will be displayed as Inactive in the Vehicles List, and the vehicle will not be available for selection in the Employee Transport Allocation module while adding or editing records.
¶ If the Vehicle Status is set to Maintenance
The status will be displayed as Maintenance in the Vehicles List, and the vehicle will not be available for selection in the Employee Transport Allocation module while adding or editing records.
Note: The vehicle status will change based on the actions performed.
¶ Filters
The following filters are available in the Vehicles List screen:
- Status – Filter vehicles based on their status (All / Active / Inactive / Maintenance).
- Search – Search for vehicles using relevant keywords.
¶ Video Tutorial
Watch this step-by-step video guide to learn how to create a visit in the system.